Recipe: Homemade Chocolates
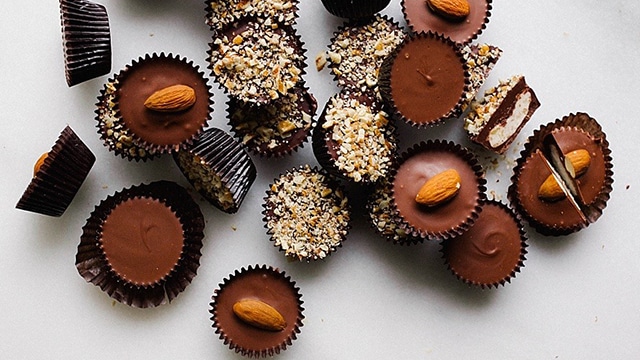
These homemade chocolates are no-bake and are made with just a few basic store-bought ingredients. (Wood and Spoon)
This is a public service announcement to the men of the world. Listen closely, boys, because I’m only going to remind you of this one time. Are you ready? Here it goes:
Next Friday, Feb. 14, is Valentine’s Day. DO. NOT. BLOW IT.
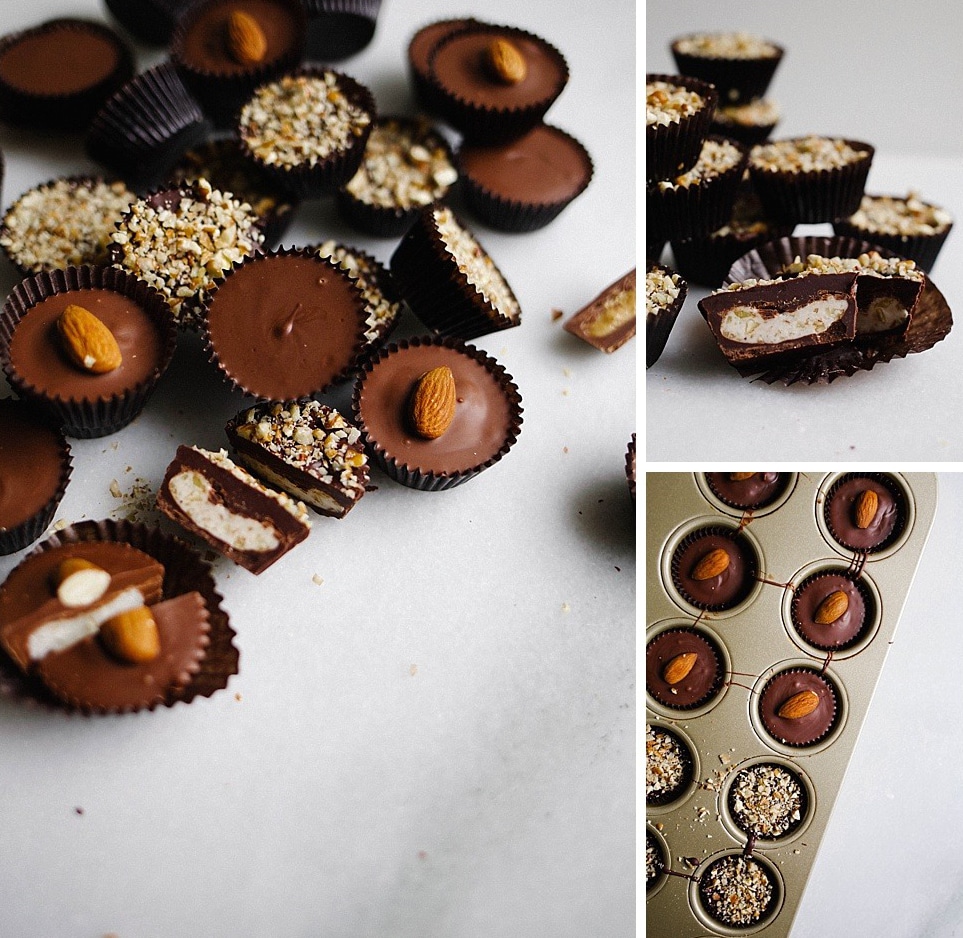
Homemade chocolates require some special equipment like a mini muffin tin and little waxed paper cups for the candies, but the assembly is quite simple. (Wood and Spoon)
Back in high school, performance on Valentine’s Day was everything. Giant teddy bear? Check. Heart-shaped balloons and bouquets of carnations? Check, check. Brian McKnight/ KC and JoJo mix tapes and folded love notes shoved through the vent of your locker? Might as well be the boyfriend starter kit.
Once you get to college, things escalate a bit. Dinner dates, rose bouquets and jewelry are the new gifting norms, although if you can land a guy who opts for concert tickets and cooking classes, YOU ARE WINNING AT EVERYTHING.
Unfortunately, after college and into adulthood, Valentine’s Day loses a bit of its luster. Babysitters are impossible to book, restaurants are too crowded and, somehow, husbands think items like Dustbusters and shower curtain liners qualify as legitimate gift options (they don’t, BTW). It’s no wonder that people get fed up with Valentine’s Day. What’s there to love about overpriced retail gimmicks and packing into movie theaters with a bunch of hormonal, sweaty-palmed middle schoolers whose moms think they’re watching the newest Pixar film with their “friends” (they’re not, BTW).
Guys, I’m going to break it down for you as plainly as I can. Please, let me make it simple for you. Are you ready?
EVERY GIRL LIKES VALENTINE’S DAY.
Yep. You heard me right. That includes your girlfriend who boycotts Hallmark and laughs at the nervous kid wearing a tie and sport coat to his first date. It includes your wife who claims flowers are a waste of money, but gives you the silent treatment when you come home empty handed. And it even includes the gal who begs you not to give her a gift and says you celebrate her love every other day of the year. No matter what they tell you, every woman wants a gesture of love on Valentine’s Day, and I know this will come as a shock to you husbands out there, but it almost always has nothing to do with… *cough* you know what. (Literally, the brains of guys everywhere are spontaneously combusting right now.)
In a pinch, you can use paper mini muffin liners, although beware that some stickage can happen. (Wood and Spoon)
You know what we want? We want chocolate. And not just any average heart-shaped, store-bought, golden box of chocolates. We want delicious, melt-in-your-mouth homemade chocolates, made by the sweat of your brow and at the expense of your time spent with a remote in your hand. Specifically, we want these bourbon pecan, peanut butter cup and coconut almond chocolates. There. Now you know. So let’s get to it.
These homemade chocolates are no-bake and are made with just a few basic store-bought ingredients. I decided to include a few variations of homemade chocolates so that there’s an option for almost everyone, but primarily so that the overachiever boyfriends can impress their ladies with an assortment of all three. But, girls, don’t be afraid to get in there and make these for your man too. If he’s got a sweet tooth like mine does, just a few of these beauties will go a long way and he will be grateful you passed on the conversation hearts and sappy card.
First up is bourbon pecan. If you’ve ever had the Southern treat of “Bourbon Balls,” you can expect something quite similar here. With a dark chocolate shell, these little bourbon pecan homemade chocolates are filled with powdered sugar, toasted pecans and premium booze. These are perfect for the bourbon lover in your life, or someone who loves their desserts extra dark and extra sweet.
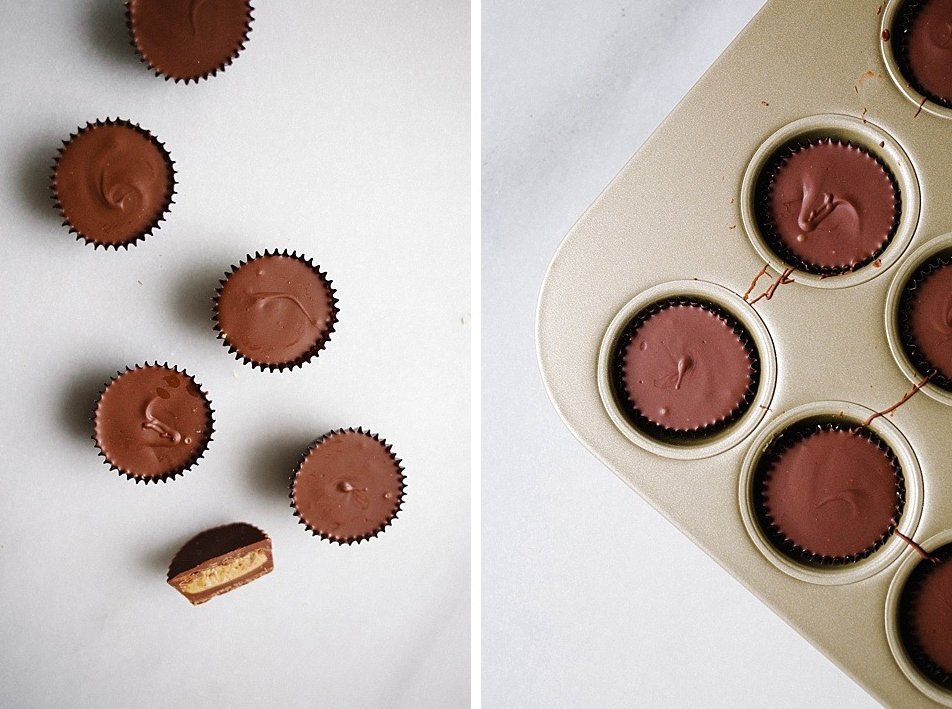
Peanut butter cups take homemade chocolates to the next level. Everyone loves the store-bought variety of peanut butter cups, but have you ever had one literally melt upon impact with your mouth? Prepare for that here. These peanut butter cups are rich, filled with a fluffy peanut butter cream filling and coated with smooth milk chocolate. A crowd favorite. If you’re ever in doubt, just go in this direction.

Go the extra mile to make someone feel like a million bucks. (Wood and Spoon)
Finally, my favorite of these homemade chocolates, the coconut almond chocolate. Filled with sweetened coconut and a little extra sugar, these little friends are coated in a milk chocolate blend and topped with a single toasted almond. Anyone who knows anything about candy will know what a treat they’re in for when they spy these little friends. For a nut-free option, leave off the almond and top with a few flakes of toasted coconut or a sprinkle of sea salt. Perfection.
These homemade chocolates require some special equipment like a mini muffin tin and little waxed paper cups for the candies, but the assembly is quite simple. In a pinch, you can use paper mini muffin liners, although beware that some stickage can happen. And if you’re not a fan of dark or milk chocolate, feel free to swap up the top used in the recipes. I like each chocolate as the recipe is written, but certainly you can switch it up if desired.
Any man friend that takes the time to muster these up for his lady is worth his weight in chocolate and has certainly outdone himself on Valentine’s Day. You should give these homemade chocolates a try for your significant other, friends, co-workers or secret admirer — they’re sure to overflow with heart eyes and appreciation. Ladies, if you’re reading this thinking, “Yes! I want my man friend to make me homemade chocolates,” just do like I do and copy the link to this post in an email to him. Yes, I know, it’s not too subtle, but if you ask me, you can’t ever be too obvious.
On the off chance that your special someone doesn’t like chocolate, let me encourage you to just let them know they’re loved in a special way. You probably already know what types of things make their heart skip a beat, so I’d challenge you to go the extra mile to make someone feel like a million bucks. Happy weekend, Happy Valentine’s Day, Happy #monthofchocolate and, as always, cheers to you.

Perfect for the bourbon lover in your life, or someone who loves their desserts extra dark and extra sweet. (Wood and Spoon)
Bourbon Pecan Chocolates
Total time: 30 minutes
Prep time: 30 minutes
Serves: 18
Ingredients
- 1 cup bittersweet chocolate
- 1 cup semisweet chocolate chips
- 2 tablespoons shortening
- 2 tablespoons unsalted butter, softened
- 1½ cups powdered sugar
- 1½ tablespoons bourbon
- ½ cup pecans, finely chopped, divided
Instructions
- In a double boiler or heat-proof bowl set over a pot of simmering water on medium-low heat, melt the chocolate chips and shortening together. Stir frequently to ensure that the chocolate does not get too hot. If you allow the chocolate to become too hot it could seize up, so be sure to keep the water on medium-low heat. Once melted, set off to the side while you prepare your filling.
- In the meantime, cream together the butter, powdered sugar and bourbon in a medium-sized bowl. Once fluffy and smooth, stir in ¼ cup of pecans. Set in the fridge to chill briefly.
- Line a mini muffin pan with waxed paper candy cups. Fill a plastic sandwich bag (or a piping bag fitted with a small, round tip) with approximately half of the melted chocolate and snip the tip of it off, being sure not to cut too large a hole or to allow all of the chocolate to drip out immediately. Squeeze 1 teaspoon of chocolate into the bottom of each of the paper candy cups and then set the plastic bag aside. Use a small instrument (I use a small, clean paintbrush or the end of a chopstick) to paint the chocolate up the sides of the paper candy cup, coating up at least half the height of the paper. This prevents the filling from showing out the sides of the chocolate once the candies are assembled. If you don’t care if the filling shows, you can skip this step. Once covered, place the pan in the fridge or freezer to chill for about 5 minutes.
- Once firmed up, scoop teaspoon-sized rounds of the bourbon pecan filling into the bottom of each cup. You can lightly wet your finger and gently smooth out the top of the filling to make a flatter mound.
- Add more chocolate to your plastic bag and then top the filling with an additional teaspoon of chocolate. Use your paintbrush to smooth out the chocolate and cover the filling completely, and then gently rap your pan on the counter to smooth and settle all three layers of the candy. Sprinkle the tops with the remaining pecans. Allow them to rest in the mini muffin tin in the fridge or freezer for at least 30 minutes. Store candies in the fridge for up to two weeks. The candies may form a white film on the chocolate if stored at room temperature for extended periods of time.
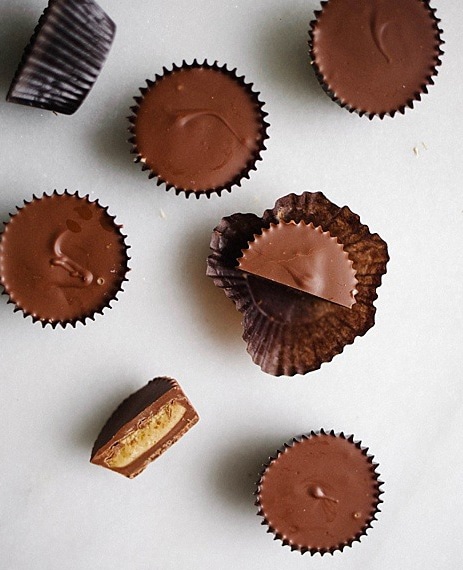
Peanut butter cups are rich, filled with a fluffy peanut butter cream filling and coated with smooth milk chocolate. (Wood and Spoon)
Peanut Butter Cups
Total time: 30
Prep time: 30
Yield: 24
Ingredients
- 1½ cups milk chocolate chips
- ¾ cup semisweet chocolate chips
- 1½ tablespoons shortening
- ½ cup peanut butter
- 1 tablespoon unsalted butter, softened
- pinch of salt
- ½ cup powdered sugar
Instructions
- In a double boiler or heat-proof bowl set over a pot of simmering water on medium-low heat, melt the chocolate chips and shortening together. Stir frequently to ensure that the chocolate does not get too hot. If you allow the chocolate to become too hot it could seize up, so be sure to keep the water on medium-low heat. Once melted, set off to the side while you prepare your filling.
- In the meantime, cream together the peanut butter and butter in a medium-sized bowl. Add the salt and powdered sugar and continue to beat until smooth and fluffy. Set in the fridge to chill briefly.
- Line a mini muffin pan with waxed paper candy cups. Fill a plastic sandwich bag (or a piping bag fitted with a small, round tip) with approximately half of the melted chocolate and snip the tip of it off, being sure not to cut too large a hole or to allow all of the chocolate to drip out immediately. Squeeze 1 teaspoon of chocolate into the bottom of each of the 24 paper candy cups and then set the plastic bag aside. Use a small instrument (I use a small, clean paintbrush or the end of a chopstick) to paint the chocolate up the sides of the paper candy cup, coating up at least half the height of the paper. This prevents the filling from showing out the sides of the chocolate once the candies are assembled. If you don’t care if the filling shows, you can skip this step. Once covered, place the pan in the fridge or freezer to chill for about 5 minutes.
- Once firmed up, scoop teaspoon-sized rounds of the peanut butter filling into the bottom of each cup. You can lightly wet your finger and gently smooth out the top of the peanut butter to make a flatter mound of filling.
- Add more chocolate to your plastic bag and then top each peanut butter mound with an additional teaspoon of chocolate. Use your paintbrush to smooth out the chocolate and cover the peanut butter completely, and then gently rap your pan on the counter to smooth and settle all three layers of the candy. Allow them to rest in the mini muffin tin in the fridge or freezer for at least 30 minutes. Store candies in the fridge for up to two weeks. The candies may form a white film on the chocolate if stored at room temperature for extended periods of time.

Coconut almond chocolate filled with sweetened coconut and a little extra sugar, these little friends are coated in a milk chocolate blend and topped with a single toasted almond. (Wood and Spoon)
Almond Coconut Chocolates
Total time: 30 minutes
Prep time: 30 minutes
Yield: 30
Ingredients
- 2 cups milk chocolate chips
- 1 cup semisweet chocolate chips
- 2 tablespoons shortening
- 1½ tablespoons melted butter
- 1½ cups shredded sweetened coconut
- 3 tablespoons corn syrup
- ¾ cup powdered sugar
- 30 whole almonds, toasted
Instructions
- In a double boiler or heat-proof bowl set over a pot of simmering water on medium-low heat, melt the chocolate chips and shortening together. Stir frequently to ensure that the chocolate does not get too hot. If you allow the chocolate to become too hot, it could seize up, so be sure to keep the water on medium-low heat. Once melted, set off to the side while you prepare your filling.
- In the meantime, beat together the butter, coconut, corn syrup and powdered sugar in a medium-sized bowl. If you wish for a smoother, less clumpy filling, feel free to whiz the mixture in a food chopper briefly. Set the filling in the fridge to chill briefly.
- Line a mini muffin pan with waxed paper candy cups. Fill a plastic sandwich bag (or a piping bag fitted with a small, round tip) with approximately half of the melted chocolate and snip the tip of it off, being sure not to cut too large a hole or to allow all of the chocolate to drip out immediately. Squeeze 1 teaspoon of chocolate into the bottom of each of the paper candy cups and then set the plastic bag aside. Use a small instrument (I use a small, clean paintbrush or the end of a chopstick) to paint the chocolate up the sides of the paper candy cup, coating up at least half the height of the paper. This prevents the filling from showing out the sides of the chocolate once the candies are assembled. If you don’t care if the filling shows, you can skip this step. Once covered, place the pan in the fridge or freezer to chill for about 5 minutes.
- Once firmed up, scoop teaspoon-sized rounds of the filling into the bottom of each cup. I like to roll teaspoon-sized balls in the palm of my hand and then flatten slightly to make flat, round disks that fit inside the paper liners.
- Add more chocolate to your plastic bag and then top the filling with an additional teaspoon of chocolate. Use your paintbrush to smooth out the chocolate and cover the filling completely, and then gently rap your pan on the counter to smooth and settle all three layers of the candy. Place a single toasted almond on top of each candy. Allow them to rest in the mini muffin tin in the fridge or freezer for at least 30 minutes. Store candies in the fridge for up to two weeks. The candies may form a white film on the chocolate if stored at room temperature for extended periods of time.
Kate Wood’s recipes can be found on her Wood and Spoon blog and on Facebook, Instagram and Pinterest.


